Next I painted my Chipboard frame and added a piece of contrasting paper to the centre
And adhered to my LO
Adhere your Photo
Now the fun part add your treated Chipboard and Blooms and Butterflies to your
LO until hearts content
and don’t forget a Chipboard Title and Chipboard accents
All of my chipboard pieces Title,Chicken wire and frame have been painted white
Here is my finished LO
Materials used Available at Scrapping Outback
Rachelle Minett Designs You Tug at my Heart Strings
Twiddleybitz Small Swirls Overlay Frame
WOW Chicken Wire with Butterflies
Green Tara - Silk Flowers with Swarovski Crystal Centres
Green Tara—Fabric Flowers Palest Pink Pack
I hope you enjoyed my Chipboard Technique and Tutorial to purchase the above products be sure to visit www.scrappingoutback.com
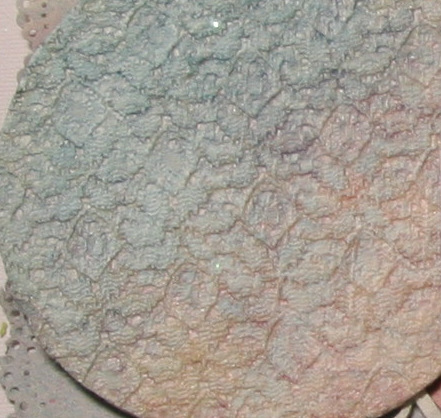
Some close ups

I have used the same Lace Technique on my butterflies
Our fabulous sponsors are donating beautiful prize packs!
WOW ,Twiddleybitz ,Imaginaruim and Scrapping Outback
Scrapping Outback is also giving away one goodies package to one lucky winner chosen from those who survived the hop.
All you have to do is become a follower of the Scrapping Outback Blog and “like us”on Facebook, as well as visit each participating blog, become of follower of those blogs and leave a comment.
When you have visited everyone return to the Scrapping Outback blog and leave us a comment letting us know how much fun you had!
If you post about this blog hop on your own blog you will be entered into the drawing twice for an extra chance to win!
There is an extra chance to win a prize, we have a mini challenge.
Use one chipboard technique (or more J) on a project for your chance to win a prize, all you have to do is link your project (it can be anything card, tag, layout etc.) to Mister Linky in the sidebar on Scrapping Outback blog. Make sure you give credit to Scrapping Outback! You have one week to complete this challenge,
it is due Sunday 23rd of June 2013 11.59pm (Australian Time).
We are sure you will be inspired by our talented design team
There is a lot to learn and there are lots of goodies to win and you won’t want to miss out! The blog hop is open to all,
prizes will be shipped to Australian residents only.
The hop will start on Friday 14th of June 2013 at 6pm & you have until Sunday 16th of June 2013 6pm to complete the hop.
The winners of the blog hop will be announced on the Scrapping Outback blog on
Be sure to check back on that day to see if you have won…
SO just as a Thank you for Blog Hopping and for stopping by and leaving me a comment and becoming a follower on my blog you have the chance to win ..
This is the fabulous prize you could win on my blog,


15 comments:
Woo Hoo!!!! Looks awesome Julie!!! Will have to give this a try! Gorgeous girly layout too!!!
wow, amazing details, thanks for sharing and the inspiration :)
Wow, this looks amazing...love your idea and fabulous tutorial....thanks for sharing. Your layout is gorgeous. :)
Stunning layout! So pretty.
Really love what you did with the lace. Great job.
Oh Jules, it's beautiful! I just love your technique, who doesn't like a touch of lace. Such a gorgeous effect, thank you so much for sharing xx
Jules, this is such a cool technique....I Love what you have created. Thank you!!!
Rachelle
Beautiful page, adore the use of lace. Thanks for sharing a fabulous idea.
Terrific Technique Jules, beautiful page as well. Thanks for sharing!
great technique great way to custom your lace
That's a very clever idea! I must try that one too. Beautiful page
so so pretty and you're such an inspiration... I love all the SO design teams' inspiring works and yours is simply stunning. thanks so much Jules for the tute and for sparing your valuable cake time for us xxx
This is so different - love it.
Love the different ways you've used lace!
great technique Julie, it adds a lot of depth to your page - thanks for sharing your technique
Post a Comment